Zdobienie

M45 – Pleiades: two captures of one object + complete guide

Zdobienie

M45 – Pleiades: two captures of one object + complete guide

M45 Pleiades (Seven Sisters)

is one of the most iconic DSO targets — a young open cluster dominated by hot B‑type stars embedded in a blue reflection nebula. The distance is about 444–445 light‑years, the total brightness ~1.6 mag, and the apparent size ~2° (~4 Moons). It sits in Taurus, best observed from late autumn to winter.

The cluster is dominated by hot blue and luminous stars that have formed within the last 100 million years. Reflection nebulae around the brightest stars were once thought to be left over material from the formation of the cluster, but are now considered likely to be an unrelated dust cloud in the interstellar medium through which the stars are currently passing.

Object: key facts

  • RA/Dec (J2000): ~03h 47m, +24° 07′ (Taurus).
  • Distance: ~444–445 ly (Gaia/HST; literature varies slightly).
  • Age: ~100 Myr (range 75–150 Myr depending on method).
  • Size & mag: ~2° across; ~1.6 mag.
  • Reflection nebulae: NGC 1432 (Maia) and NGC 1435 (Merope); the dust is unrelated to the cluster’s formation — the stars are passing through an interstellar cloud.
  • Evolution: the cluster will disperse in ~250 Myr due to galactic interactions.


New research (2025): Using TESS + Gaia, astronomers identified a Greater Pleiades Complex — a dispersed family of >3,000 related stars spanning ~1,900 ly, tripling the known membership context. This doesn’t change the visual M45 appearance but reframes cluster dynamics.


Two captures — what they show

Capture A

  • Integration: 5 h 56 min net (several sessions; ISO 1600 + 1000; one session without Flats).
  • Processing: APP + RT + GIMP; multi‑session merge → small mosaic; harder calibration but greater dynamic range and dust detail around Alcyone/Maia/Merope.

M45 - Pleiades


  • Composition: Astro Pixel Processor,
  • Processing: RT + GIMP + plug-ins (Linux),
  • Total exposure time minus defective lights: 5h56 min. ISO 1600 + 1000
  • Calibration frames (one missing session): Flat, DarkFlat, Bias


Capture B (multi‑session mosaic, 2019)

  • Shows a different composition and nebulosity emphasis (e.g., Merope Nebula / NGC 1435, or the Atlas–Pleione pair in the “handle”). Useful to compare chroma/halo control around brightest stars.
  • Nebula context per star: NGC 1432 (Maia), NGC 1435 (Merope), vdB 23 (Alcyone); tiny IC 349 near Merope.

Plejady / Pleiades - M45

Computer simulations have shown that the Pleiades were probably formed from a compact configuration that resembled the Orion Nebula. Astronomers estimate that the cluster will survive for about another 250 million years, after which it will disperse due to gravitational interactions with its galactic neighborhood.

Astrophotography tip

M45 is easy to overexpose. Use shorter subs for wide fields (halo control) or longer integration at higher focal length to pull delicate reflection dust. Prefer no LP filter; balance color carefully; stretch gently.

How to find & when to shoot

M45 sits in Taurus; from mid‑northern latitudes it’s best in December (high altitude, good contrast). It’s bright enough to be seen with the naked eye even under moderate light pollution.

Curiosities

  • “Golden Gate of the Ecliptic”: with the Hyades, Pleiades frame a classic ecliptic gateway.
  • Subaru: in Japanese the cluster is Subaru — hence the car logo.
  • Mythology: the Seven Sisters (Alcyone, Maia, Merope, Electra, Taygeta, Celaeno, Sterope), with Atlas and Pleione.


References:

Support my work on Ko-fi

Did this guide help you?

I create these guides and projects as a hobby. If I helped you save time or money, consider supporting my work with a coffee. It keeps the energy flowing for future projects.

Categories
Newest articles

iOptron CEM 25P

iOptron CEM 25P RA axle bearings replacement

iOptron CEM 25P RA axle bearings replacement. Instructions for how to replace faulty RA-axis bearings (6907) in the iOptron CEM 25P mount yourself. Eliminate friction and improve tracking accuracy. Do…

Support

Was description useful? Consider to support author, it prevents to post annoying ads for you. All you just could do is once a year, sponsor for me a coffee. The currency, amount, doesn’t matter to me. Matter to me, that you want!

Read

Similar Articles

SynScan controller firmware update

SynScan controller firmware update – NEQ6Pro

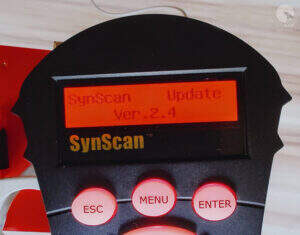
WARNING – the author of this manual accepts no responsibility, for any damages that may occur as a result of following this manual. All actions described in this manual are undertaken at your own risk. SynScan controller firmware update – Introduction   Starting from version 3.0, users can independently update the firmware of SynScan controllers for NEQ mounts. Simply download the latest software version from the Sky-Watcher website and perform the update following the instructions provided here. Requirements SynScan™ Hand Control of version 3.0 or later. Windows 8.1 or later An available RS-232C communication port on the PC RS232-USB hardware converter in case of missing DB9 COM port in your laptop / PC PC link cable that comes with the SynScan™ hand control DC power supply with 12~14V/1A output. Power plug should be 2.1mm diameter, tip positive.      Preparation for update Create a directory called SynScan, preferably on your C: drive. Visit the Support Page of the Sky-Watcher website at https://www.skywatcher.com/download/software/ Download and save two files, follow with example: Windows program: SynScan Firmware Loader, Version 3.5 – click with Download button. you’ll save a file with name: synscan_verXXXXXX_firmware_release.zip where XXXXXX – is a version nr Next download Firmware: SynScan V4/V5 Hand Controller For All GO-TO Mounts, Version 4.39.21 – click on Download button you’ll save a file with name: synscanfirmwareloader_verXX.zip where XX – is version nr Connecting devices Connect the USB-COM (RS232) adapter to the computer’s USB port.   Connect the male COM plug of the adapter to the female COM plug of the SynScan controller cable.   Connect the RJ-11 plug of the controller’s COM cable to the RJ-11 port on the controller. Ensure that the plug is securely inserted—you should hear a distinct “click” as the plug snaps firmly into place in the controller’s socket.   Connect the controller to the mount using the dedicated cable – RJ45 plug to the COM port on the mount. Ensure the cable is securely connected to both the controller and the mount for proper communication during operation. We now have the following connection setup – example:   Firmware update the SynScan™ Hand Control On the controller, simultaneously press and hold the buttons “0” and “8.” Turn on the mount’s power as shown in below photo. The controller will emit a “beep” sound during startup and then display the message “SynScan Update Ver….” as shown in the image. The controller has now been set to firmware update mode. This indicates that the device is ready for the next steps in the firmware update process. On your computer, run the Computer Manager and find the COM port which will be used for update. With this example it is COM5. Check the COM port number on your system. Open Computer Management and locate the COM port. To do this on a Windows system: Press Win + X and select Computer Management from the menu. In the Computer Management window, navigate to Device Manager. Expand the section labeled Ports (COM & LPT). Here, you will see a list of available COM ports along with their assigned numbers (e.g., COM1, COM2). With this example it is COM5. Run the SynScanFirmwareLoader.exe software on your PC. Once the program is launched, you should see a window SynScan Firmware Loader , make sure the “Auto-detect COM Port” checkbox has been unchecked. Set the COM port. Click the HC Version button. The program will attempt to connect to the controller and retrieve information about the hardware version, firmware, and the celestial object database. You will see the version numbers at the bottom of the Firmware Loader as shown on below picture. If the program is unable to communicate with the controller, enable the Auto-detect COM Port option and click the HC Version button again. If the Loader program cannot detect an available COM port, check the connection between the controller and the computer. Click Browse to select the SynScanVXXXX.ssf file in the SynScan folder. It is recommended to enable the – Enforce database update – option and then click the Update button to start the update procedure. This ensures that the entire database is refreshed during the update process, reducing the risk of any errors or omissions. The update status can be monitored under the Update and HC. Version buttons. Update Complete. Click on the HC. Version button and check if the controller has reported a new Firmware version. The update was fully successful. Close the Loader program and turn off mount power suppl. Turn the mount’s power back on and check whether the controller displays the new firmware version. Check if the mount and H.C. works properly. As you can see, the firmware update process for the SynScan V4 controller is not overly complicated, but it does require careful attention. It’s crucial to follow all the steps outlined in this guide in the correct sequence, with focus and precision. I hope the description provided could be at least somewhat helpful.   It’s worth mentioning that the mount performs excellently in the field when used with the PERUN II power bank.

Read more...