Usage of the PIPP program is relatively simple. It is recommended to follow the step rules – from left to right, going through all the tabs of the program, starting from the Source Files tab and ending with the Do Processing tab. We will go successively through the tabs, processing the Moon with an example light frames that I collected. I will focus only on those options that I need to use. It is not my goal, to describe every available option, that’s why the manual is available on the PIPP page.
EXIF parameters, for my light frames you can find below. The camera with default optical configuration.
Movie file:
- file .MOV 1,4GB, RGB
- Width: 1920, Height: 1080,
- Duration: 3min. 5 sec.,
- bitrate: 63,5MB/s, FPS: 25
Let’s start processing with movie file. Start PIPP from software list of POL.
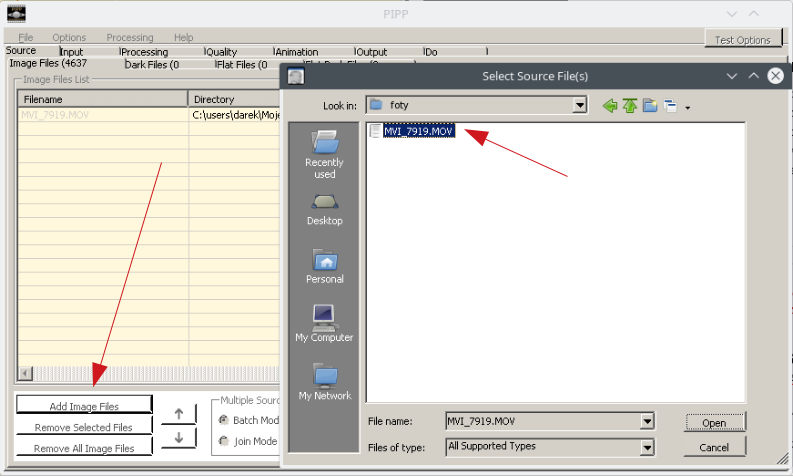
Source Files tab
Click on Add Image Files in the below area of PIPP window. In the file selection window add a movie file and click Open.
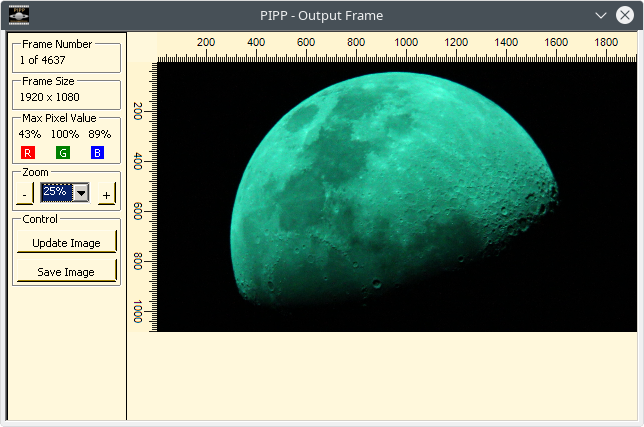
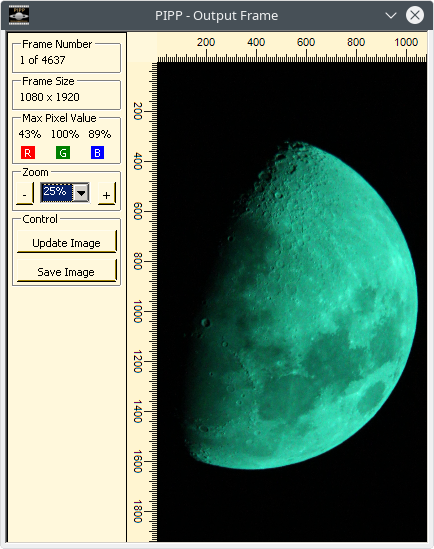
After you selected the file, the program will open a new, additional window with preview frame of your movie file. The preview image can be enlarged by changing the Zoom value or by clicking the – / + buttons. The Update Image button is used to update the preview after making configuration changes on the other tabs as described below. The Save Image button will save visible image as selected file type .JPG, .PNG, .TIFF, or Windows bitmap.
Go to the next tab.
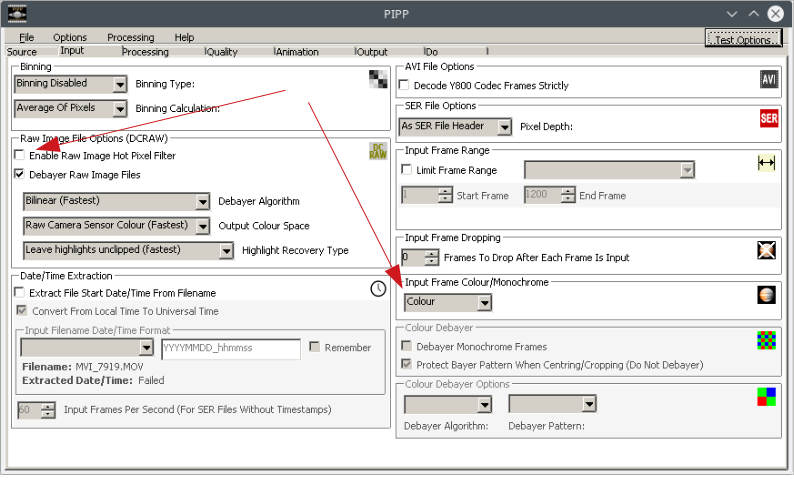
Input Options tab
The options and functions available on this tab, will apply mainly to video files made by dedicated astrophotography cameras.
In the case of DSLR cameras use, usually there is no need to change anything on this tab. Optionally, you can use the available functions:
- Enable Raw Image Hot Pixel Filter – will remove unwanted hot pixels if the video file has one,
- Input Frame Colour/Monochrome – set to Color if you know your video is colorful.
Go to the next tab.
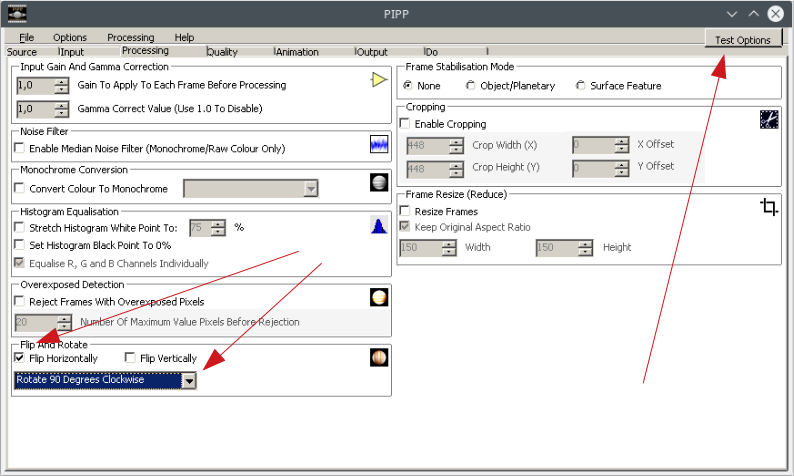
Processing tab
On this tab, we can already slightly improve the image visible in the preview window. In the case of my light frames, the image is inverted relative to the real one. I will use the available option to invert the image horizontally. I’m selecting the Flip Horizontally option. In addition, during my camera recording video file, it orientated the image of the moon in horizontal instead of vertical position, so I have to rotate the image in 90° clockwise degree. So, I need to click on the drop-down list in the Flip And Rotate area and choose the Rotate 90 Degrees Clockwise option and then on the Test Options button to see the final effect of the changes.
Preview changes below.
Go to the next tab.
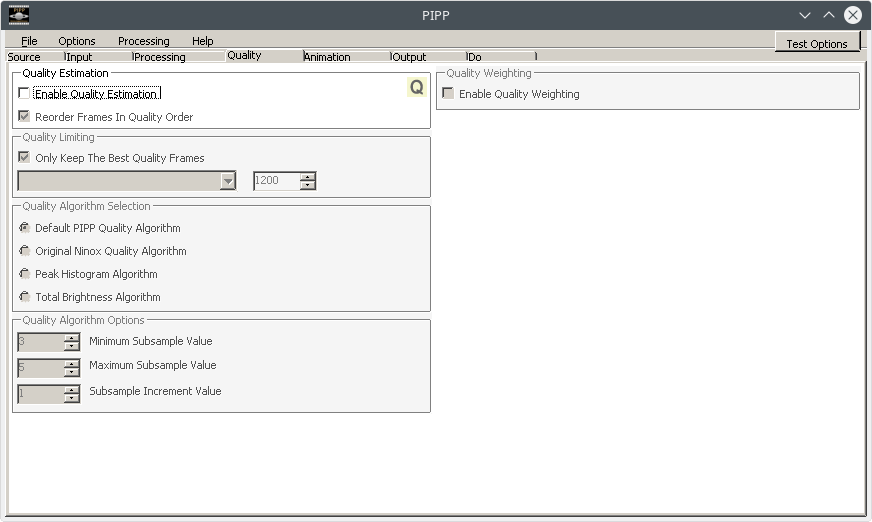
Quality tab
None of the options available on this tab will be used with my movie file.
Go to the next tab.
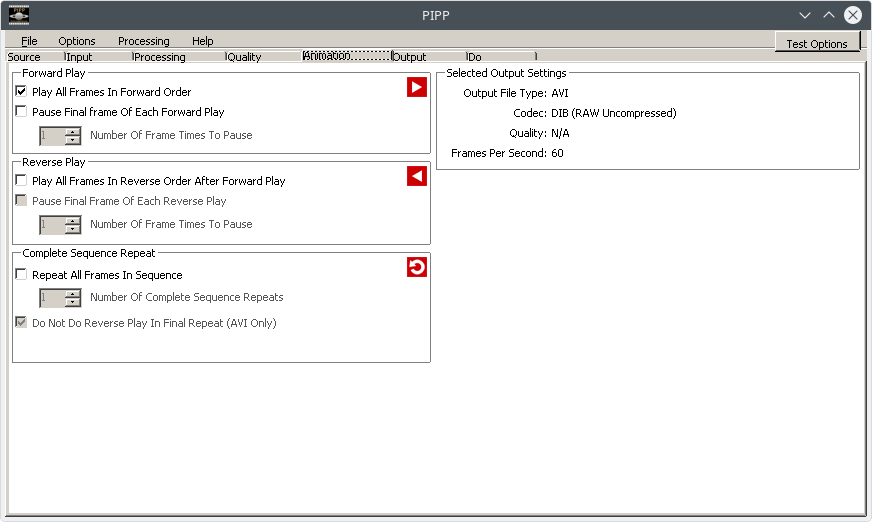
Animation tab
Leave the available options in the default configuration.
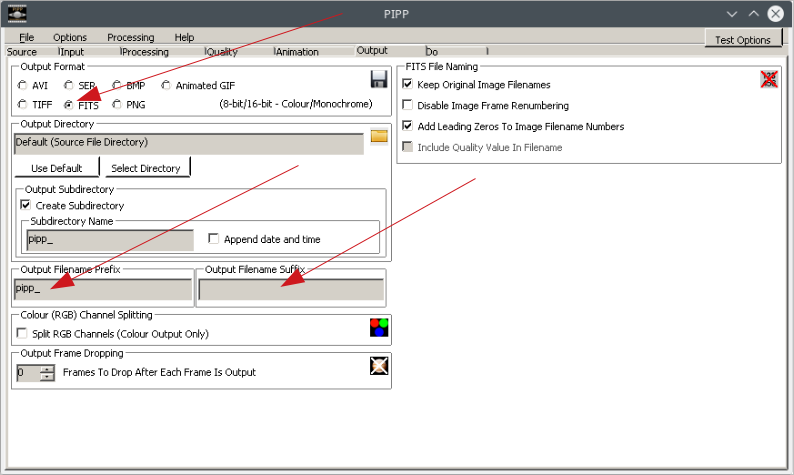
Output tab
The purpose of processing a video file, is to divide it into individual frames that will be stacked later in dedicated software. The best type of photo file saving available in PIPP is .FITS in my opinion and we also choose it.
I don’t want the resulting files to have suffix pipp_ attached at the end of their name, so I delete the entry in the Output Filename Suffix field. I want the resulting image files to have a prefix called pipp_ before the name and I entered this prefix in the text field Output Filename Prefix.
Go to the next tab.
Do Processing tab
Click the Start Processing button and wait. Depending on the number of movie frames, processing may take some time. In my case, it took less than 4 minutes to process the video file containing 4637 frames. So, was pretty fast. Now you can proceed, to stacking light frame files in the program, e.g. AutoStakkert, RegiStax6 or Siril.

Was description useful? Consider to support author, it prevents to post annoying ads for you. All you just could do is once a year, sponsor for me a coffee. The currency, amount, doesn’t matter to me. Matter to me, that you want! 🙂 PayPal link below.