Even though this article has been around for ages, it still offers valuable insights and practical support for users of the SkyWatcher NEQ6Pro mounts. The content has been refreshed and tailored to match the current website engine, making sure everything looks and runs as smoothly as possible.
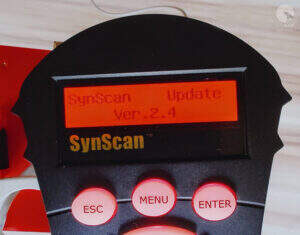
At some point while using the controller, I noticed that the ESC button wasn’t always working. I lived with it, but after a while, the left Ra button also started acting up and wouldn’t always connect. A red flag went up in my head – something needed to be done. It’s worth noting that the problems appeared right after the warranty period ended… coincidence?
There weren’t many options, just two: either send the controller for service and pay a considerable amount for the repair, or try to fix it myself. My tinkering nature took over (as always), and I set about solving the problem on my own.
I assumed that some dirt or substance must have gotten inside, which over time became sticky and was gripping the button. I don’t recall spilling any liquid on the controller, but I also can’t rule out a situation where rain or high humidity (fog) penetrated the controller’s interior.
My recent, not-so-great experiences with electronics, especially those manufactured in China, gave me an idea of what I might find inside, so I prepared a few things for the job.
Contact spray – quite a nice product for cleaning and degreasing electronics and optical devices, including removing contaminants from glass without damaging optical coatings.
Cotton swabs are a must-have.

Plastik 70 spray – in my electronics work, I usually reach for Plastik 70 spray (clear lacquer). It creates a thin, transparent, and, most importantly, sealed coating. It excellently protects soldering points from the tin components oxidizing and forming ‘cold solder’ joints, which stop conducting electricity relatively quickly after service work.
A small, so-called artistic brush will be necessary to precisely and evenly spread the Plastik 70 over the repaired surfaces.

Let’s get to work.
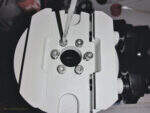
We’re unscrewing the controller; it’s held together by 4 Phillips head screws.

There are no clips, so slowly and gently, but without excessive force, we remove the housing. On the left side, carefully disconnect the white ribbon cable (signal) with the white plug and the plug with the colored wires (power).

Grab the PCB board from the left side and slowly, gently turn it over to the right side.
Contamination is visible at the soldering points of the white ribbon cable. Below, you can see dirty pads for the ESC button. Now I know where the problem with the uneven operation came from; it would connect sometimes and sometimes it wouldn’t – irritating.

It’s not that visible in the photo, but the direction button pads weren’t exactly clean either. It was quite noticeable under the light.

The opposite end of the controller, was also dirty. The soldering points of the disconnected plugs. The button pads were also dirty. I’m at my wit’s end. There’s no choice, the entire PCB will have to be cleaned.

How to clean without breaking anything? Spray a little of the substance into the removed cap from the contact cleaner and dip a cotton swab in it. Lightly wipe out the dirty areas. Repeat the process until all the dirt is removed.
Once you’ve cleaned all the areas, you need to protect the soldering points. Plastik 70 and a brush will be used for this purpose. The procedure is very similar to cleaning. Spray a little of the substance into the removed cap. Use the brush to apply the Plastik 70 to the soldering points. Wait 10 minutes for the applied Plastik 70 to dry.”
View of the controller after cleaning the soldering points of the electronics, pads, and applying a protective plastic coating to the soldering points:


I think it turned out quite decently. In my assessment, that’s everything.
All that’s left is to reassemble the controller and test its operation. The problems that occurred earlier have disappeared.