WARNING – the author of this manual accepts no responsibility, for any damages that may occur as a result of following this manual. All actions described in this manual are undertaken at your own risk.
SynScan controller firmware update – Introduction
Starting from version 3.0, users can independently update the firmware of SynScan controllers for NEQ mounts. Simply download the latest software version from the Sky-Watcher website and perform the update following the instructions provided here.
Requirements
- SynScan™ Hand Control of version 3.0 or later.
- Windows 8.1 or later
- An available RS-232C communication port on the PC
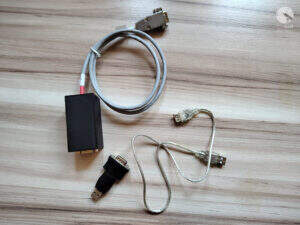
- RS232-USB hardware converter in case of missing DB9 COM port in your laptop / PC
- PC link cable that comes with the SynScan™ hand control
- DC power supply with 12~14V/1A output. Power plug should be 2.1mm diameter, tip positive.

Preparation for update
Create a directory called SynScan, preferably on your C:\ drive.
Visit the Support Page of the Sky-Watcher website at https://www.skywatcher.com/download/software/
Download and save two files, follow with example:
Windows program: SynScan Firmware Loader, Version 3.5 – click with Download button.

you’ll save a file with name: synscan_verXXXXXX_firmware_release.zip
where XXXXXX – is a version nr
Next download Firmware: SynScan V4/V5 Hand Controller For All GO-TO Mounts, Version 4.39.21 – click on Download button

you’ll save a file with name: synscanfirmwareloader_verXX.zip
where XX – is version nr
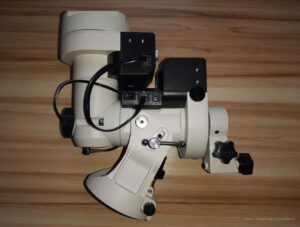
Connecting devices
Connect the USB-COM (RS232) adapter to the computer’s USB port.
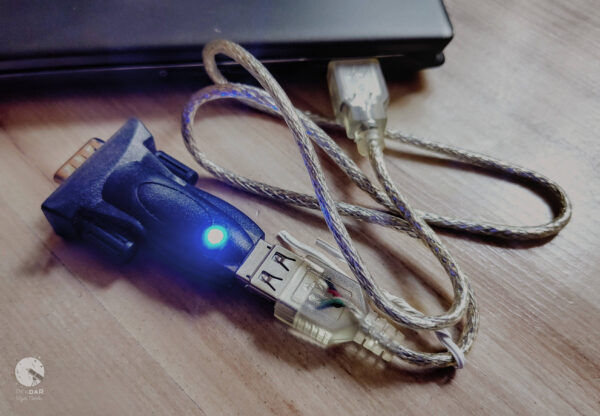
Connect the male COM plug of the adapter to the female COM plug of the SynScan controller cable.
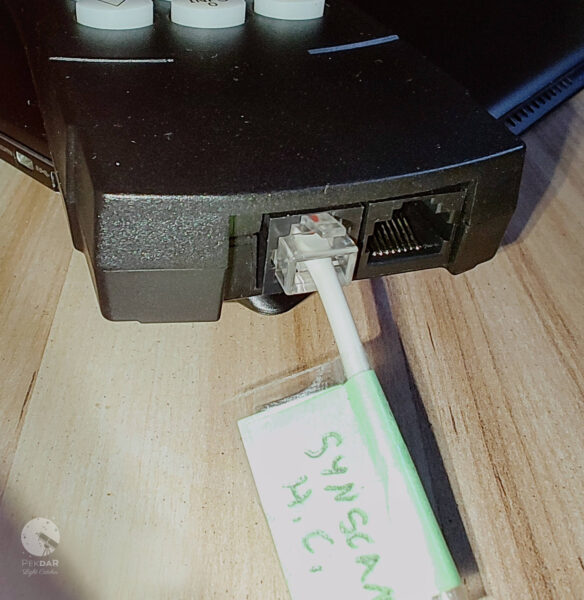
Connect the RJ-11 plug of the controller’s COM cable to the RJ-11 port on the controller. Ensure that the plug is securely inserted—you should hear a distinct “click” as the plug snaps firmly into place in the controller’s socket.
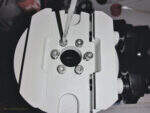
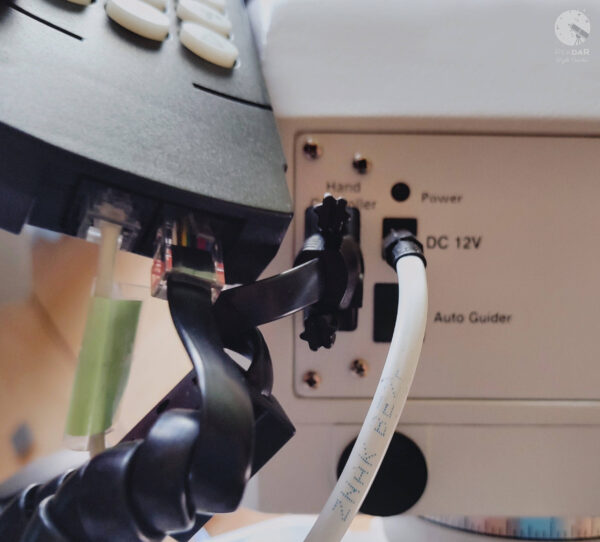
Connect the controller to the mount using the dedicated cable – RJ45 plug to the COM port on the mount. Ensure the cable is securely connected to both the controller and the mount for proper communication during operation.
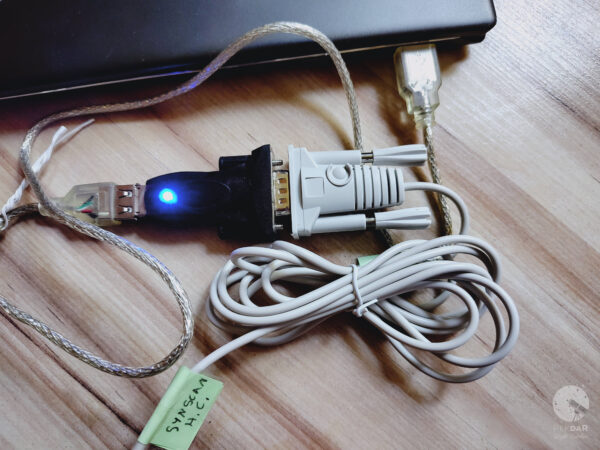
We now have the following connection setup – example:

Firmware update the SynScan™ Hand Control
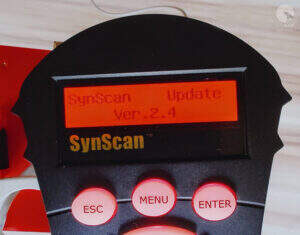
On the controller, simultaneously press and hold the buttons “0” and “8.” Turn on the mount’s power as shown in below photo.
The controller will emit a “beep” sound during startup and then display the message “SynScan Update Ver….” as shown in the image. The controller has now been set to firmware update mode.
This indicates that the device is ready for the next steps in the firmware update process.
On your computer, run the Computer Manager and find the COM port which will be used for update. With this example it is COM5.
Check the COM port number on your system. Open Computer Management and locate the COM port.
To do this on a Windows system:
Press Win + X and select Computer Management from the menu.
In the Computer Management window, navigate to Device Manager.
Expand the section labeled Ports (COM & LPT).
Here, you will see a list of available COM ports along with their assigned numbers (e.g., COM1, COM2).
With this example it is COM5.

Run the SynScanFirmwareLoader.exe software on your PC.

Once the program is launched, you should see a window SynScan Firmware Loader , make sure the “Auto-detect COM Port” checkbox has been unchecked. Set the COM port.

Click the HC Version button. The program will attempt to connect to the controller and retrieve information about the hardware version, firmware, and the celestial object database. You will see the version numbers at the bottom of the Firmware Loader as shown on below picture.
If the program is unable to communicate with the controller, enable the Auto-detect COM Port option and click the HC Version button again.

If the Loader program cannot detect an available COM port, check the connection between the controller and the computer.
Click Browse to select the SynScanVXXXX.ssf file in the SynScan folder.

It is recommended to enable the – Enforce database update – option and then click the Update button to start the update procedure. This ensures that the entire database is refreshed during the update process, reducing the risk of any errors or omissions.

The update status can be monitored under the Update and HC. Version buttons.


Update Complete.

Click on the HC. Version button and check if the controller has reported a new Firmware version.
The update was fully successful.

Close the Loader program and turn off mount power suppl.
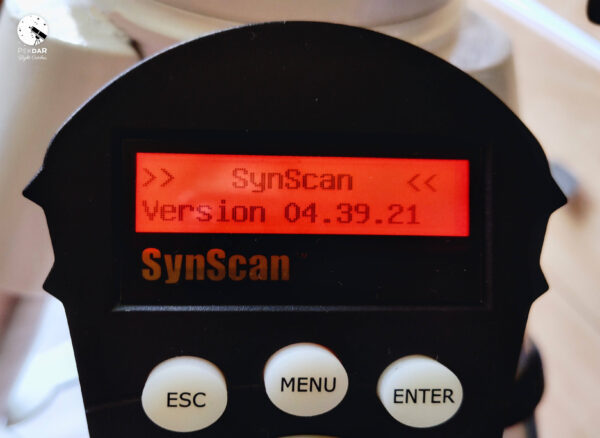
Turn the mount’s power back on and check whether the controller displays the new firmware version.
Check if the mount and H.C. works properly.
As you can see, the firmware update process for the SynScan V4 controller is not overly complicated, but it does require careful attention. It’s crucial to follow all the steps outlined in this guide in the correct sequence, with focus and precision.
I hope the description provided could be at least somewhat helpful.
It’s worth mentioning that the mount performs excellently in the field when used with the PERUN II power bank.