Zdobienie

PERUN II – Astrophotography Power Bank & Counterweight

Zdobienie

PERUN II – Astrophotography Power Bank & Counterweight

You can find many different power banks on the market. Unfortunately, none of them met my personal expectations in terms of Astrophotography Power Bank with available power, mobility and small size for mobile Astrophotography and Astronomy. Especially in the context of the possibility to take the power bank on board plane and to be comply with restrictions, requirements and rules present with airlines and security gates regulations.

PERUN II - 3D model
PERUN II – 3D model

To cover defined above requirements and needs the „PERUN II”, was created, which is improved version of discontinued PERUN first version.

Why “Perun” name? It is the god of thunder and lightning of the ancient Slavic religion. The name reflects the nature of this project and a large amount of energy that has been accumulated in a really small volume of Perun.

Perun - Slavic god of thunder
Perun - ancient symbol

While using the first version of PERUN, I carefully noted all its shortcomings and user suggestions, which became very valuable later.

After 2 years of work since first PERUN was released, the first beta version of PERUN II was created. The first prototype was very successful and quickly passed with several field tests. Soon after the second version of prototype was created and it was very close to final version – this version was so successful, that I decided to make it available to a few people who were awaiting with improved version… The third and last version of prototype which has already become the final version containing most of the improvements, based on the collected notes and valuable suggestions from users.

PERUN II - Body
PERUN II - Korpus / Body

PERUN II arised

Compared to the first version of PERUN, I have added new functionalities reported by users and others based on my own needs, which as it turned out later, were also appreciated by users. This is how a new list of requirements was created, containing changes and improvements, constituting the new goal of the project.

Project goals – more important points
  • Power source for astronomy / astrophotography devices in the field, without access to a permanent power source.

  • Possibility to take PERUN II on board the plane, based on present (Feb. 2024) requirements and safety rules during travel with power banks.

  • Using a Perun as a counterweight to assembly on a rod counterbalance mount. Especially for mounts NEQ6 and iOptron.

  • Double amount of available power and the number of available power ports for devices by connecting two pcs of PERUN to each other.

  • Possibility to quickly charge a set of batteries, without removing them from the PERUN body.

Technical specification for Astrophotography Power Bank

PERUN II can use up to 6 pcs of batteries, model: NP-F950/960/970 or compatible, f.e.:

NP-F970 - battery - bottom view
NP-F970 – battery – bottom view

They can be purchased in most stores offering photographic and film equipment.

NP-F970 - battery - top view
NP-F970 – battery – top view

Battery technical specifications for model NP-F970. You must buy it separately by your self:

  • Lithium-ion battery.

  • 7.2 VDC voltage.

  • 8600mAh capacity.

  • Equipped with a chip, compatible with InfoLithium.

  • Standard warranty – 12 months.

  • Free from memory effect.

  • The max. of the power of six pcs of batteries: 371,5 Wh

To charge batteriesin 100% full you need to buy separately by your self NP-F standard charger or compatible.

NP-F - battery charger
Vendor charger – model: NP-F970


Optional – Dedicated fast battery charger for batteries model NPF-970 or compatible.

PERUN II Battery chager - PC970
PERUN C970 – fast battery charger for batteries model NPF-970 or compatible

Approximately 9-10 hours of continuous shooting for the configuration:

  • CEM25P mount,

  • MGen II guider,

  • AITK HORIZON RGB CMOS camera

The body hole diameter fits the iOptron rod counterweight. After using a dedicated reduction, it also fits on the NEQ6Pro counterweight rod and compatible.

Tested and proven devices in cooperation with PERUN II:

  • Lacerta MGen2 + CCD (guider) camera,

  • Omegon Pro CCD (guider camera),

  • CMOS ATIK Horizon RGB camera,

  • ASI 2600MC Pro camera,

  • RaspBerry PI4 (Astroberry),

  • AsiAir (with maximum power requirements 5A),

  • AsiAir Plus (with maximum power requirements 5A),

  • Parallactic mount CEM25p,

  • Parallactic mount CEM26,

  • Parallactic mount HEQ5,

  • Parallactic mount NEQ6Pro,

  • Parallactic mount NYX-101,

  • 2x USB heater,

  • Power source for mobile phone,

  • Power source for other mobile power banks charged with USB port

Body housing dimensions – without batteries, battery locks, switches, charging port cover and body locking screws.

PERUN II – Housing dimensions without external items

X → 124 [mm] +- 1 [mm]

Y → 134 [mm] +- 1 [mm]

Z → 56 [mm] +- 1 [mm]

Total dimensions of the body, including batteries (NPF-970 model) and elements protruding beyond the main outline of the body case:

PERUN II – Total body dimension including external items

X → 129 [mm] +- 1 [mm]

Y → 142 [mm] +- 1 [mm]

Z → 162 [mm] +- 1 [mm]

Functional specification for Astrophotography Power Bank

  • Input current filtering.

  • Output current filtering.

  • Over-voltage protection on power ports (12 VDC).

  • Over-voltage and over-current protection on input power converters.
  • Filtering out electromagnetic interference on power ports.

  • Filtering out electrical noise on power ports.

  • Two PWR converters working in parallel – in case of one PWR converter became failed*, PERUN II will continuous operational with half of the available power of 4 [A].

  • Main power switch (red).

  • Dedicated power switch for each power port.

  • Dedicated LED signaling of the power status of each port.

  • LED battery level indicator.

  • Dedicated port for fast charging batteries and connecting PERUN II (twice more available energy).

  • Possibility to take on board the plane.

  • Very high energy-to-weight ratio transported on board the aircraft.

  • Perun itself is a counterweight to the devices suspended on the mount. The more batteries used with Perun, the more counterbalanced it is. At the same time offering more energy at your disposal.

  • Batteries HOT-SWAP during operational.

* – depends on the nature of the converter failure.

Characteristics of PERUN II

The power source are batteries with a voltage of 7.2 VDC each. Connected in parallel.

During operation, the voltage level automatically decreases in according to the battery discharge state.

PERUN II – full load with 6 pcs of batteries, model: NP-F970
  • Summary of the currents of all connected devices in one time, must not exceed 8 [A].

  • Two PWR converters working in parallel – in case of one PWR converter became failed*, PERUN II will continuous operational with half ( 4 [A] ) of the available power.

  • Without load, PERUN II generates no heat. It heats up slightly during load, therefore does not require active cooling.

  • Has three 12VDC power ports. Each power port has a current protection of 5 [A]. The set includes one spare 5 [A] fuse.

PERUN II – Power port with belonging switch
PERUN / PRUN II - 5 Amps spare fuse
  • PERUN II is able to handle momentary currents greater than the nominal operating current 8 [A]. However the connected devices, must be protected against damage.

  • Voltage range on the power ports has been set in between: 12.2 – 12.9 VDC,

  • LED battery level indicator,

PERUN II - LED battery level indicator and charging socket
PERUN II – LED battery level indicator and charging socket
  • Two USB 5VDC ports – power or charge any device connected to USB-A ports, f.e.:

    • heater,

    • mobile phone,

    • another power bank.

  • USB ports can be load with a current of 3 [A], you can power or charge any device powered by a USB port in an accelerated mode if they recognize correctly the fast charging protocol.

  • The same charging port is also used to join PERUN II in a “chain” – doubling the available energy – look to the chapter “Joining PERUN II – twice as much available energy“

PERUN II – dedicated charging / joining port with batteries model NP-F970
Battery HOT-SWAP

If you have more than 6 pcs of batteries, you can replace the currently used ones, which are already discharged or close to running out of energy, with new, fully charged ones during the photo session.

You must remember that the batteries used with PERUN II are not perfect identical/equal (although they are the same model and product) and they discharge each other unequally. To avoid a situation, during battery replacement that, there is suddenly no energy to power the connected devices, replace the batteries one at a time.

The procedure for battery replacing during a astrophotography session is described in the user manual.

PERUN Charger 970 - Optional

Optionally, you can purchase a dedicated fast charger (PERUN C970) for NP-F970 or compatible batteries.

The PERUN C970 charger supports only batteries of the NP-F970 model or PERUN II compatible batteries. Using the charger with another battery model may damage the battery, charger and PERUN II, for which the author and the manufacturer are not responsible.

PERUN C970 charges the NP-F970 model battery to a maximum of approximately 80% +-5% of its capacity. The percentages given are indicative.

Specification - PERUN C970

External dimensions of the housing:

PERUN C970 – housing dimension

X → 205 [mm] +- 1 [mm]

Y → 56 [mm] +- 1[mm]

Z → 95 [mm] +- 1 [mm]

Total dimensions (including elements stick out beyond the main outline of the housing):

PERUN C970 – total dimensions - including elements stick out beyond the main outline of the housing
PERUN C970 – total dimensions – including elements stick out beyond the main outline of the housing

X → 208 [mm] +- 1 [mm]

Y → 61 [mm] +- 1 [mm]

Z → 95 [mm] +- 1 [mm]

The charger’s AC power socket is a standard, compatible with power sockets on PC power supplies.

There is a current protection device between the AC power socket and the main switch. Standard glass fuse 10 [A].

PERUN C970 - AC power socket with power switch
PERUN C970 – AC power socket with power switch

The charging process information display, represents information like:

  • Temperature inside the charger, right next to the power converters. The safe operating temperature range is 0 – 85 [C].

  • Value of current during battery charging process.

  • Value of voltage during battery charging process.

PERUN C970 - Charging process information display
PERUN C970 – Charging process information display

Active cooling – PWM fan.

PERUN C970 – View of the fan holes
PERUN C970 – View of the fan
PERUN II and PERUN C970 - battery charging process
PERUN II and PERUN C970 – battery charging process

Joining PERUN II – twice as much available energy

If you have two pcs of PERUN II, you can connect / join them to get double amount of available energy and extend in double the operating time of your astrophotography set.

To connect / join PERUN II together, you will need a dedicated PERUN II charging / joining cable included with PERUN II set or included with PERUN C970.

The description how to connect PERUN II is described in the user manual.

PERUN II - stacked
PERUN II – stacked

Connecting / joining both PERUN II showed as example on the Figure provides discharge process in balance of both PERUN II and you can power up to 6 pcs devices! At the same time and each will receive as much energy as needed – with limit to max 5 [A] / power socket / device and max 8 [A] / one pcs of PERUN II.

Included

  1. Body – six ports for a battery model: NP-F950 / 960/970, (batteries with a charger must be purchased separately),
    PERUN II - Body
    PERUN II – Body
  2. Two locks securing the batteries against uncontrolled sliding out of the port – in the case of reverse mounting on the counterweight rod,

    PERUN - battery locks
    PERUN – battery locks
  3. Spare fuse,

    PERUN / PRUN II - 5 Amps spare fuse
    PERUN / PRUN II – 5 Amps spare fuse
  4. A set of three power cables, including one with a ferrite filter,

    PERUN II - Power cable for devices
    PERUN II – Power cable for devices
  5. Two locking screws for the body to lock it on the counterweight rod,

    PERUN II - locking screws for the body
    PERUN II – locking screws for the body
  6. Counterweight rod diameter reducer for mounts equipped with a counterweight rod with a diameter less than 19.9 mm, e.g. mounts: EQ, HEQ, NEQ.

    PERUN II - Counterweight rod diameter adapter
    PERUN II – Counterweight rod diameter adapter
    PERUN / PERUN II - Adapter in use
    PERUN / PERUN II – Adapter in use
  7. Set of 6 pcs battery covers, model: NP-F970,

PERUN II – Installed battery covers
PERUN II – Battery covers

Comparison to other solutions

The comparison I will provide below is almost the same as in the publication regarding PERUN.

I’ve only updated the cost, based on the final price of the new version, which includes more electronics and additional devices.

Alternative solution, no longer available (checked 22/1/2024) with non valid price: https://www.ioptron.com/product-p/8128.htm

– PowerWeightTM CW Battery – iOptron – has a maximum power of 96Wh with the price of 158 USD (old price from 2020, customs and vat tax excluded), which can be taken on board the plane.

In order to get the amount of required power comparable to what offer us a Perun, you need to purchase 4 pcs. PowerWeightTM CW Battery, which gives us cost:

PekDar's astrophotography setup - 2023
Astrophotography setup with NEQ6Pro mount, 2x PERUN II stacked, CMOS camera, 6 inch Telescope and Astroberry driver with own designed case box + some additional

4x96W = 384Wh –> cost 4×158 USD = 632 USD Gross, price 1Wh = 1,65 USD Gross

4 pcs of PowerWeightTM CW Battery you can’t put as counterweight on the rod. Even if I use the counterbalance rod extension, we can fit a maximum of 2 pcs on it.

It only gives me half of the power I need to run my astrophotography setup, during the entire night (8 hours average of collecting lights).

– PERUN II – has maximum power 371.5Wh with price (199 EUR body + 132 EUR for 6 pcs battery pack = 331 EUR) – Total cost is 1Wh = 0,89 EUR.

Depend of the destination country… If we add customs duties and tax fees to the PowerWeightTM CW Battery, the difference will be even greater against of PERUN II. After this article, besides the price, I don’t think I need to mention the functional advantage of PERUN II.

PERUN volume shape, it takes less space than 1 pcs of PowerWeightTM CW Battery !

Therefore, it is possible to add one more PERUN-s as a counterweight on a rod, which will provide total of 743Wh of power! If you could fit 3 pcs of Perun, you would have to change the Watt unit to kW! of power, on a piece of iron rod as a counterweight to my assembly.

PERUN is an uncompromising and unrivaled solution that guarantees me a power reserve for use in the field without access to a permanent power source.

If you are interested in to buy PERUN, please contact me. The e-mail address you can found in the footer of the page or you can full fill contact form. You can also contact me via Messenger / WhatsApp / Signal.

ATTENTION! – the prices given are indicative (with high accuracy). The final price valuation may differ slightly due to the inflation increase in the prices of components needed to build PERUN and their availability or availability of replacements and local TAX applicable.

Support my work on Ko-fi

Did this guide help you?

I create these guides and projects as a hobby. If I helped you save time or money, consider supporting my work with a coffee. It keeps the energy flowing for future projects.

Categories
Newest articles

iOptron CEM 25P

iOptron CEM 25P RA axle bearings replacement

iOptron CEM 25P RA axle bearings replacement. Instructions for how to replace faulty RA-axis bearings (6907) in the iOptron CEM 25P mount yourself. Eliminate friction and improve tracking accuracy. Do…

Support

Was description useful? Consider to support author, it prevents to post annoying ads for you. All you just could do is once a year, sponsor for me a coffee. The currency, amount, doesn’t matter to me. Matter to me, that you want!

Read

Similar Articles

SynScan controller firmware update

SynScan controller firmware update – NEQ6Pro

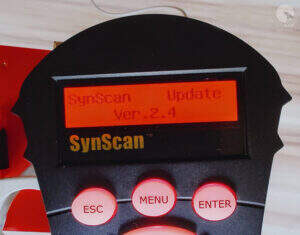
WARNING – the author of this manual accepts no responsibility, for any damages that may occur as a result of following this manual. All actions described in this manual are undertaken at your own risk. SynScan controller firmware update – Introduction   Starting from version 3.0, users can independently update the firmware of SynScan controllers for NEQ mounts. Simply download the latest software version from the Sky-Watcher website and perform the update following the instructions provided here. Requirements SynScan™ Hand Control of version 3.0 or later. Windows 8.1 or later An available RS-232C communication port on the PC RS232-USB hardware converter in case of missing DB9 COM port in your laptop / PC PC link cable that comes with the SynScan™ hand control DC power supply with 12~14V/1A output. Power plug should be 2.1mm diameter, tip positive.      Preparation for update Create a directory called SynScan, preferably on your C: drive. Visit the Support Page of the Sky-Watcher website at https://www.skywatcher.com/download/software/ Download and save two files, follow with example: Windows program: SynScan Firmware Loader, Version 3.5 – click with Download button. you’ll save a file with name: synscan_verXXXXXX_firmware_release.zip where XXXXXX – is a version nr Next download Firmware: SynScan V4/V5 Hand Controller For All GO-TO Mounts, Version 4.39.21 – click on Download button you’ll save a file with name: synscanfirmwareloader_verXX.zip where XX – is version nr Connecting devices Connect the USB-COM (RS232) adapter to the computer’s USB port.   Connect the male COM plug of the adapter to the female COM plug of the SynScan controller cable.   Connect the RJ-11 plug of the controller’s COM cable to the RJ-11 port on the controller. Ensure that the plug is securely inserted—you should hear a distinct “click” as the plug snaps firmly into place in the controller’s socket.   Connect the controller to the mount using the dedicated cable – RJ45 plug to the COM port on the mount. Ensure the cable is securely connected to both the controller and the mount for proper communication during operation. We now have the following connection setup – example:   Firmware update the SynScan™ Hand Control On the controller, simultaneously press and hold the buttons “0” and “8.” Turn on the mount’s power as shown in below photo. The controller will emit a “beep” sound during startup and then display the message “SynScan Update Ver….” as shown in the image. The controller has now been set to firmware update mode. This indicates that the device is ready for the next steps in the firmware update process. On your computer, run the Computer Manager and find the COM port which will be used for update. With this example it is COM5. Check the COM port number on your system. Open Computer Management and locate the COM port. To do this on a Windows system: Press Win + X and select Computer Management from the menu. In the Computer Management window, navigate to Device Manager. Expand the section labeled Ports (COM & LPT). Here, you will see a list of available COM ports along with their assigned numbers (e.g., COM1, COM2). With this example it is COM5. Run the SynScanFirmwareLoader.exe software on your PC. Once the program is launched, you should see a window SynScan Firmware Loader , make sure the “Auto-detect COM Port” checkbox has been unchecked. Set the COM port. Click the HC Version button. The program will attempt to connect to the controller and retrieve information about the hardware version, firmware, and the celestial object database. You will see the version numbers at the bottom of the Firmware Loader as shown on below picture. If the program is unable to communicate with the controller, enable the Auto-detect COM Port option and click the HC Version button again. If the Loader program cannot detect an available COM port, check the connection between the controller and the computer. Click Browse to select the SynScanVXXXX.ssf file in the SynScan folder. It is recommended to enable the – Enforce database update – option and then click the Update button to start the update procedure. This ensures that the entire database is refreshed during the update process, reducing the risk of any errors or omissions. The update status can be monitored under the Update and HC. Version buttons. Update Complete. Click on the HC. Version button and check if the controller has reported a new Firmware version. The update was fully successful. Close the Loader program and turn off mount power suppl. Turn the mount’s power back on and check whether the controller displays the new firmware version. Check if the mount and H.C. works properly. As you can see, the firmware update process for the SynScan V4 controller is not overly complicated, but it does require careful attention. It’s crucial to follow all the steps outlined in this guide in the correct sequence, with focus and precision. I hope the description provided could be at least somewhat helpful.   It’s worth mentioning that the mount performs excellently in the field when used with the PERUN II power bank.

Read more...