Stellarium – Beyond the Standard Catalog
The Solar System database in Stellarium is updated regularly, but new comets appear faster than official data packages. To plan a photography session for an object that has “just arrived,” you must use the Solar System Editor plugin.
The Mechanism: Orbital Elements (MPC)
Stellarium does not store images of comets but rather their orbital elements (including perihelion, eccentricity, inclination). Based on these, the software engine calculates the object’s current position in the sky for your specific location. The most reliable source for this data is the Minor Planet Center (MPC).
Shortened Step-by-Step Instructions
-
Activate the Plugin: Go to “Configuration Window” [F2] -> “Plugins” -> “Solar System Editor”. Ensure “Load at startup” is checked and restart the program.
-
Import Data: In the plugin settings, select the “Solar System” tab and click “Import orbital elements in MPC format”.
-
Select Object Type: Choose “Comets” or “Asteroids.”
-
Online Source: Select an MPC server from the list (e.g., MPC’s list of observable comets). The program will connect to the web and download the list.
-
Search: Type the comet’s name (e.g., “C/2023 A3”). Once it appears, check it and click “Add objects”.
Why is this better than manual entry?
Manual entry of orbital elements is prone to formatting errors, leading to incorrect position calculations. Automatic import from the MPC ensures that parameters are up-to-date, which is crucial as comet orbits undergo subtle changes due to planetary gravity.
Detailed guide

You will need Stellarium version 0.18 minimum and internet access.
Run Stellarium and go to Configuration Window (F2 key).
Click the Plugins tab. On the left from the list at the bottom, click on Solar System Editor and enable the Load at startup option.
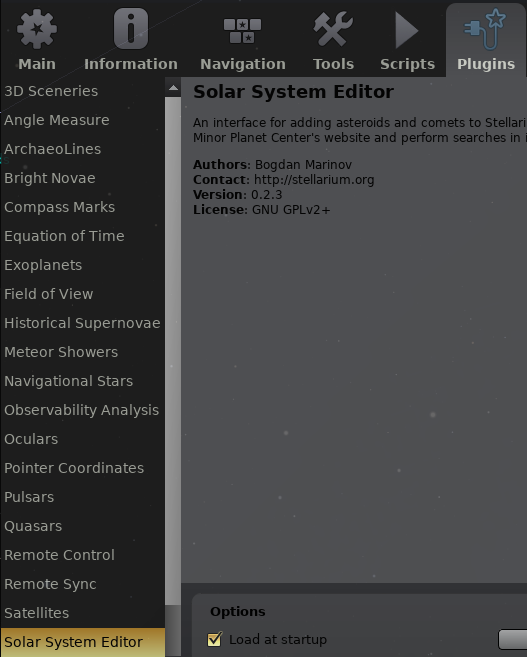
Close the window and restart Stellarium.
Go to Configuration Window (F2) → Plugins → Solar System Editor and click the configure plugin button.
Go to the Solar System tab and click Import orbital elements in MPC format …

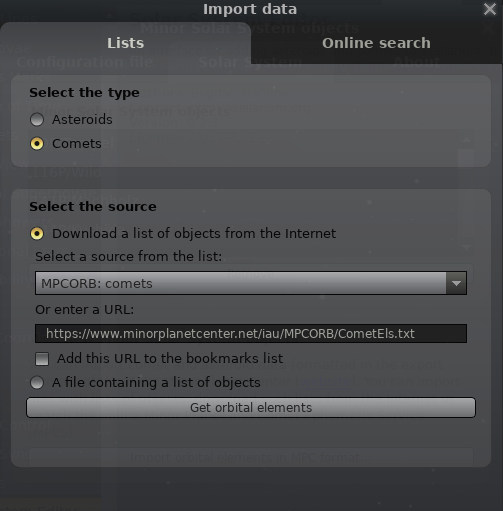
Click on the Lists tab, enable Comets. In the Select the source section, enable Download a list of objects from the Internet. Click on the drop-down list and select MPCORB: comets. Click on Get orbital elements.
In the Import Data window, enter the searched comet in the text field, C/2019 Y4 (ATLAS). Select the object and click Add objects.
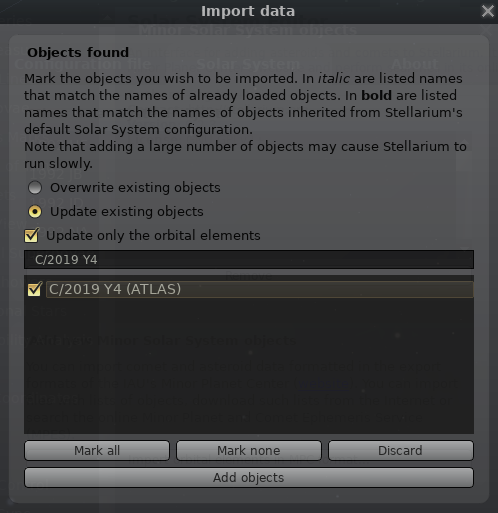
Close all configuration windows.
Go to object search and click the magnifying glass – Search window (F3)
In the search field, enter C/2019 Y4. The search engine will complete the rest of the entry itself. Click the magnifying glass.
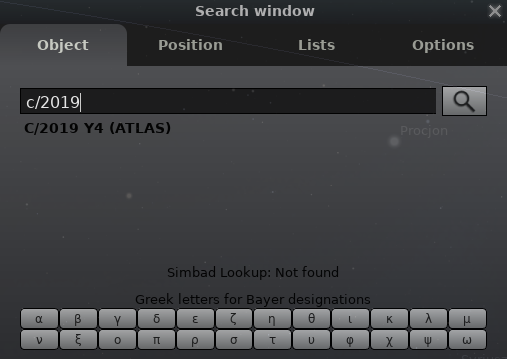
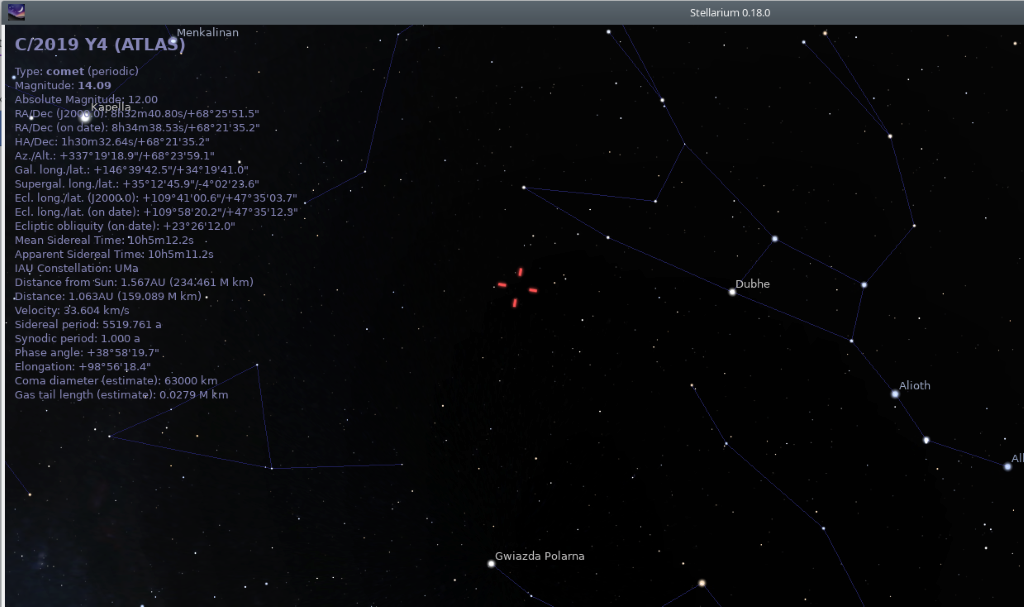
The program will set the sky on comet its own.
Done