The main goal of this description is to provide you, with the ability to quickly stack photos using the APP (Astro Pixel Processor) program, in the shortest possible time with minimal the baggage of knowledge need. I share with you what I know. I have gained experience using the APP program on my own.
Remember that each photo of collected lights is different and the examples below, will not necessarily work for your collected photo lights. You should always look for the optimal settings and solutions for each lights. Please, note that I am not the Developer of the APP (Astro Pixel Processor), but only I’m user like you. I don’t know answer to every question that bothers you. Nor am I any representative of the APP Developer or its publisher.
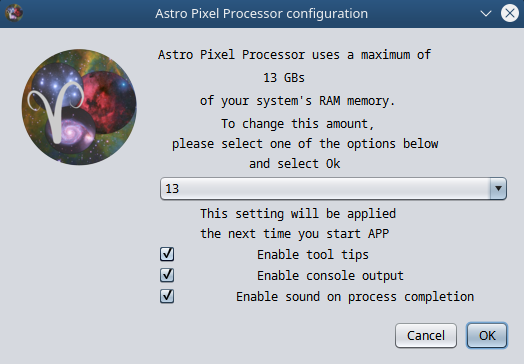
APP Preconfiguration
Click on CFG button

From the drop-down list, set the amount of RAM you want to allocate for use with APP. The rule is simple, more = better.
After setting the desired amount of memory, click on OK and that’s it.
Lights processing – ATIK Horizon CMOS color camera
The Light files are made with “ATIK Horizon color camera” with the filter used in the optical path. The Light Pollution filter “IDAS LPS-D2 48mm”.
We will be processing a photo from a single session so, the following settings of individual tabs are in the given configuration.
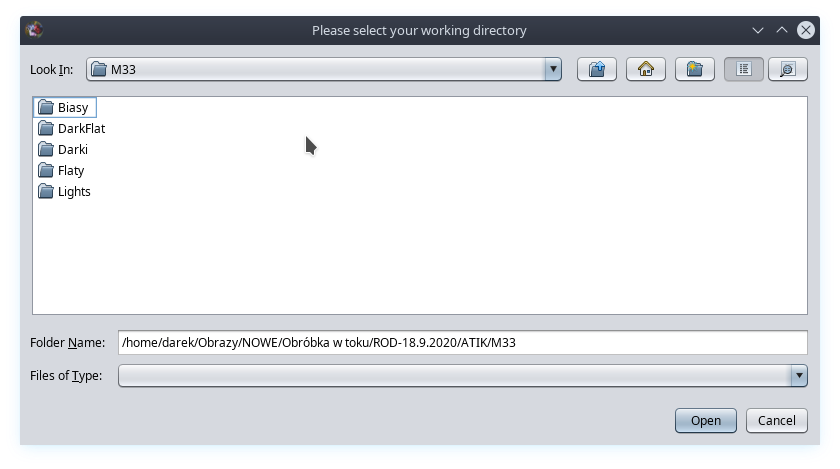
Run the APP program (my version is 1.081). Shortly after starting a window will appear in which you have to enter the path, to the working directory. Preferably the same directory that contains Lights files for stacking.
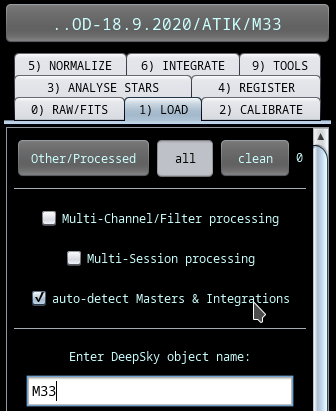
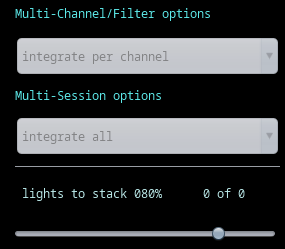
On the left side of the program window, under the tabs, uncheck two options:
• Multi-Channel / Filter processing
• Multi-Session processing
In the Enter DeepSky object name: text box, enter the name of the object that was photographed.
After selected files are loaded, the counter for Lights will change from 0 to the number, of files that we have indicated for loading. In my example, there are 89 files.

0) RAW/FITS
ATTENTION! if your photo material was made with a camera, set pattern to supported.
- pattern set to supported
- turn off force Bayer/X-Trans CFA
Click on the tab 0) RAW / FITS. It is very important to know the sensor type of the camera, on which the photos were taken. In the case of ATIK Horizon it is GRBG and such should be set for pattern from the list of available types. We enable the force Bayer / X-Trans CFA option, the other options are not changed.

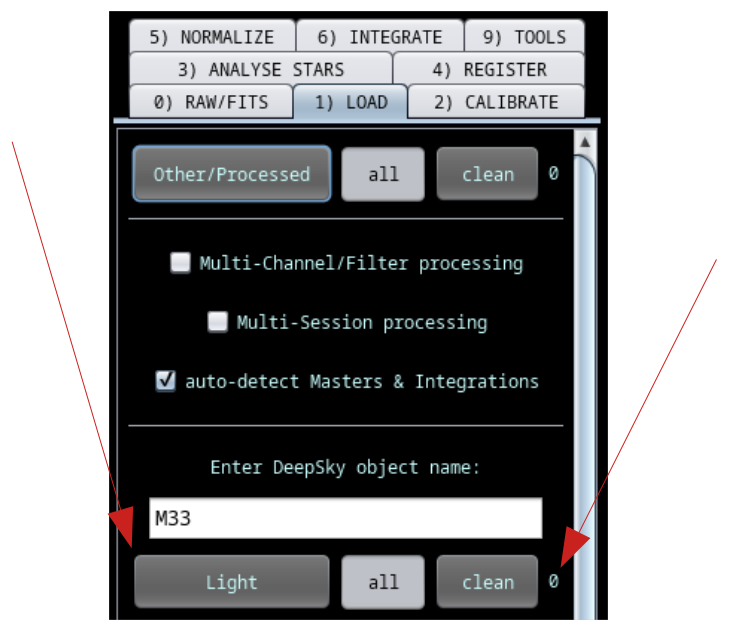
1) LOAD
Go back to the 1) LOAD tab and click the Light button to load the Light photo files. Notice the counter with status 0 to the right behind the buttons.
In the file selection window, select the files you want to load and click the Open button.
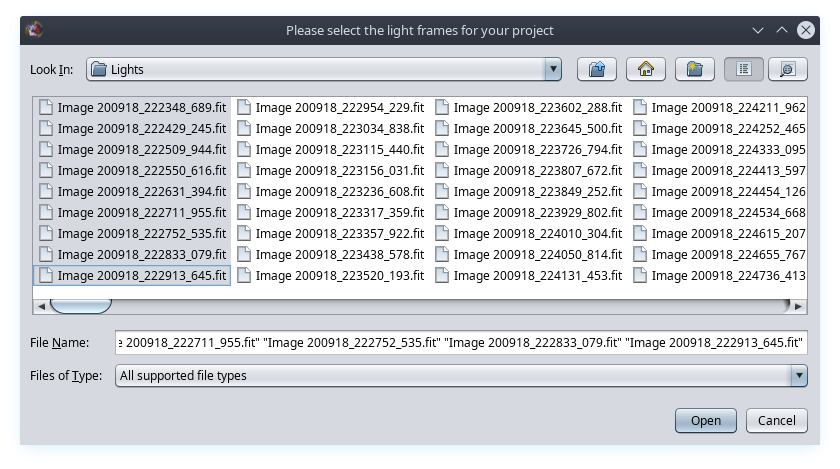
After the selected files are loaded, the counter for Light will change from 0 to the number of files, that we have indicated for loading. In my example, there are 89 files.

At the very bottom of the program window, there is a preview of the list of loaded files. It is worth reading the description of each column – helpful and necessary information.

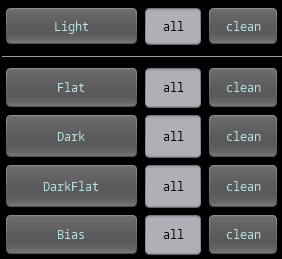
Now repeat the process of loading files for the types: Flat, Dark, DarkFlat and Bias. You can skip all calibration frames or the missing type, then you should take into account that the quality of the photo will be worse.
If you already have previously generated MasterFlat, MasterDark, MasterDarkFlat, MasterBias and BadPixelMap files for the Flat, Dark, DarkFlat and Bias file groups, that you want to use, you can load them now and skip the Master… regeneration process it saves a lot of time in the whole photo stacking process. WARNING! Remember that Master files generated from a given group belong to the Lights files photo session. The exceptions to this rule are BadPixelMap and MasterBias.
2) CALIBRATE
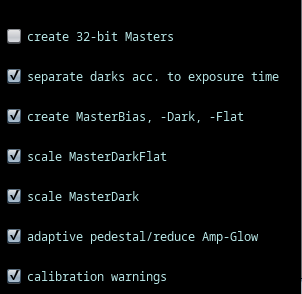
Plenty of options available here, you can get a little overwhelming. We will be focusing only on a few specific options following my example. I think that the following description will be applicable in most cases of the collected lights files. Most options have a default value that we won’t change except for a few.
Turn on:
- scale MasterDarkFlat
- scale MasterDark
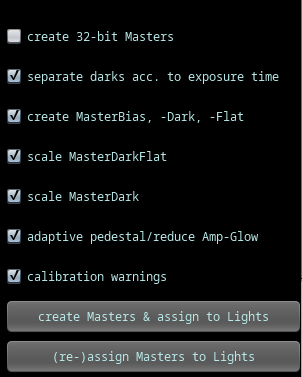
Now it’s time to generate Masters calibration files. Click on the create Masters & assign to Lights button.
WARNING! – If you have already loaded Master calibration files, click the (re-) assign Masters to Lights button, this will assign the lights files to the calibration files.
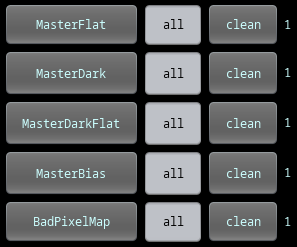
After creating the Master photos, you can see what they look like. This is very important. The quality of stacked the final photo depends on the quality of Master files preparation. In the file view list (at the bottom of the program window), you will see the Master files created.

To view the mentioned files, just click 2x LMB on their name to load them to preview. Below is a sample of how my Master files look like. They are generally not bad and they are suitable as a calibration files for lights files.
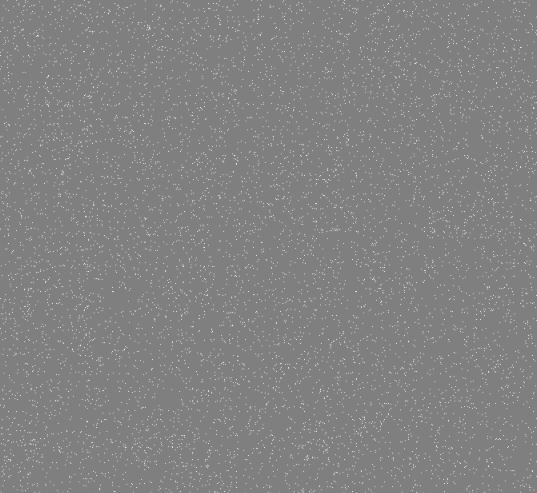
BadPixelMap – zoom 80%
MasterFlat
MasterDark – zoom 80%
MasterDarkFlat
MasterBias
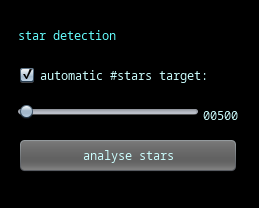
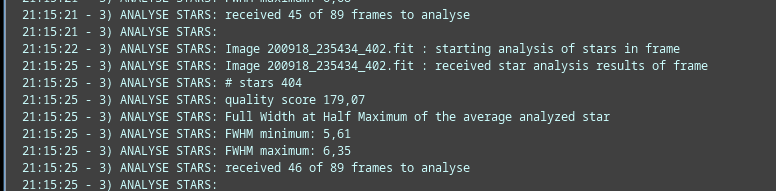
3) ANALYZE STARS
We do not change the default value.
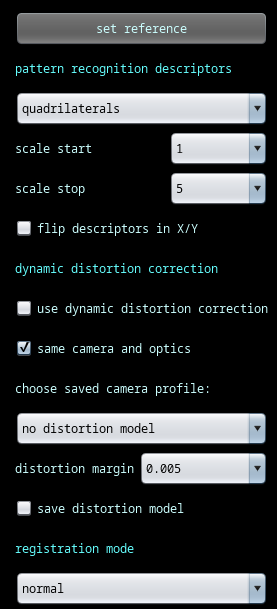
4) REGISTER
Most of the default options are set correctly and we will not change them. Let’s go to the next tab.
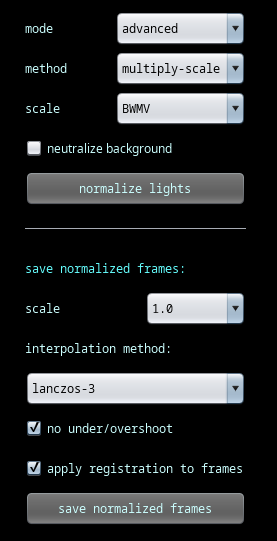
5) NORMALIZE
Configure the individual options as described below. It is possible that some options, are already set by default as defined below.
- Mode: advanced
- method: multiply-scale
- scale: BWMV
- OFF neutralize background
- scale: 1.0
- interpolation method: lanczos-3
- ON no under/overshoot
- ON apply registration to frames
6) INTEGRATE
This tab has several important options to set. There is a slider just below the words lights to stack 100%. We need to set it to around 80% if we have enough Lights files. If you only have a few Lights files, don’t move the slider! It’s my opinion.
- ON no under/overshoot
- kernel: topHatKernel
- droplet size: 1.0
- mode: interpolation
- scale: 1.0
After configuring the options, click on the Integrate button to start the integration process.
Depending on the number of Lights files, this process can really take a long time. For example, for 89 Light files with already prepared Master calibration files, the integration process took about 30 minutes. on my computer with the configuration like: CPU i7, 42GB RAM, 2x HDD 7200 rpm in software RAID 1. Of course, this information is approximate, but will allow you to estimate more or less the processing time of Lights files and better plan your personal time.
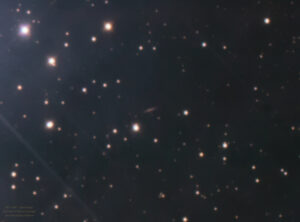
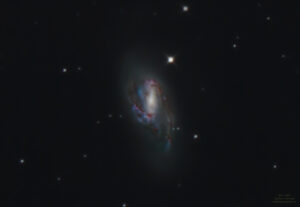
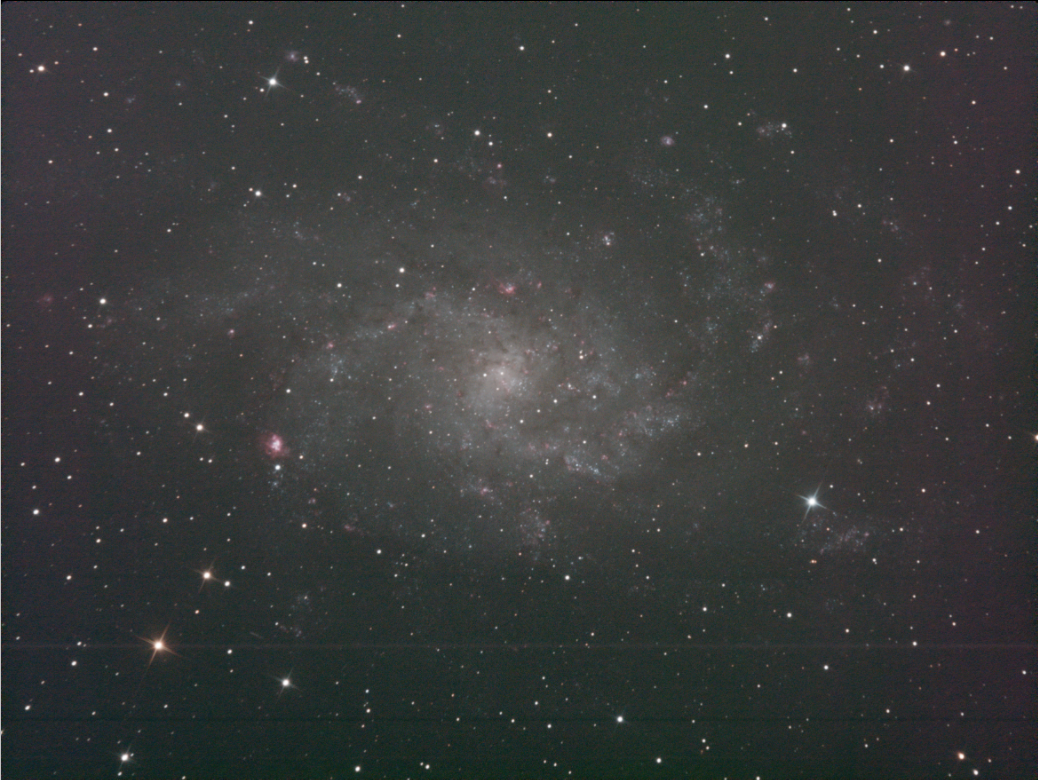
Result
After the data processing is completed, a new file with the previously given name will be created on the file preview list, described as Integration 1. In my example it is M33-1.fits file.

The APP will automatically load the final file for preview.
If the reached result is satisfying you, the final file can be further processed (GIMP, RawTherapee, PS). If the end result is not satisfying, read the above description again and think about, where did you made a mistake and repeat the steps.
If you are sure that you have followed all the steps correctly, it may be time to move on to the more advanced tutorial and make better use of the functions available in the APP. To do this, you need to refer to the Advanced Guide, which may already be available on the website http://www.astrophotography.pekdar.net.